

Adjusting your 3-point hitch sway is a matter of centering the implement and then tightening your stabilizers, like turnbuckles or adjustable bars. This simple adjustment can often fix the problem. But if it doesn’t, the issue may be elsewhere in the hitch connection. Keep reading. We’ll walk you through 3-point hitch sway adjustment step by step.
How Much 3-Point Hitch Sway Is Normal?
Because the right amount of sway depends entirely on the implement you are using. There is no single setting that works for everything.
For implements that engage the ground and need to follow their own path, like a moldboard plow, you actually want significant side-to-side movement. A plow needs to “drift” freely in the furrow. If you restrict its movement with tight stabilizer chains or bars, the plow will try to steer the tractor from the rear. This is not only inefficient but can be very dangerous, as you can lose control of the tractor’s direction. For plows, stabilizers should be loose or disconnected entirely.
However, for most other implements, you want to control the sway. With attachments like a rotary cutter (bush hog), box blade, landscape rake, or tiller, excessive sway is a problem. You don’t want the implement clanking against your tires or shifting unpredictably on uneven ground. For these tools, a small amount of play is acceptable—typically around 1 to 2 inches of total side-to-side movement. This tiny bit of flex helps protect the hitch and implement from shock loads if you bump into something, but it’s not enough to cause control issues.
Why Does a 3-Point Hitch Sway Too Much?
If your implement sways too much, it’s usually from these common issues. You need to find what’s causing it before you can fix it.
- Improperly Adjusted Stabilizers: The sway bars, chains, or turnbuckles are either too loose or have not been set correctly for the specific implement.
- Worn Components: On older tractors, the bushings, pins, or the stabilizers themselves can be worn out, creating extra play in the system that can’t be adjusted out.
- Incorrect Parts: Sometimes, a tractor may be fitted with the wrong stabilizer parts. For example, turnbuckles that are too long won’t be able to shorten enough to properly restrict movement, a frustrating issue that can happen even on new equipment.
- Excessive Play at the Implement Pins: This is a very common and often overlooked cause. Your tractor’s lower lift arms connect to the implement via hitch pins. On many implements, these pins are longer than the width of the lift arm, allowing the arm to slide back and forth on the pin. Even if your stabilizers are fully tightened, this play at the implement connection will still allow for significant sway.
How to Adjust 3-Point Hitch Sway?
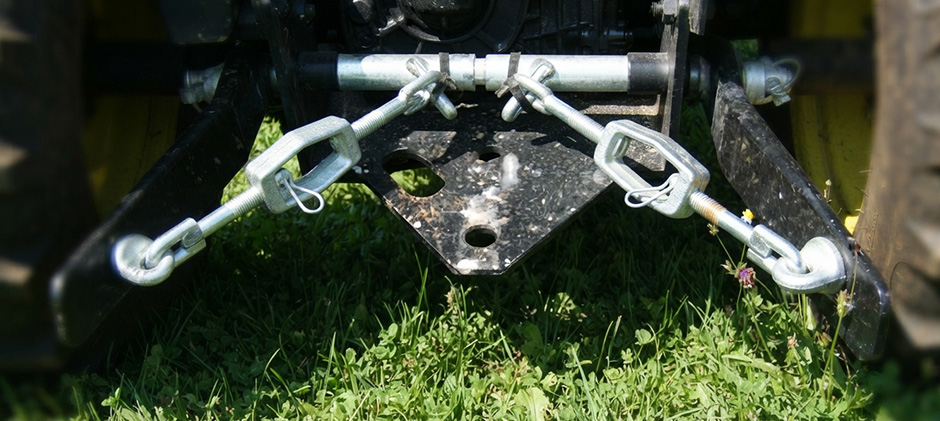
Let’s walk through how to make the adjustment correctly. Your goal is to center the implement behind the tractor and restrict its side-to-side movement. First, check what kind of stabilizer setup your tractor uses. Here are the most common ones:
- Turnbuckles: Threaded rods you twist to make the stabilizer longer or shorter.
- Telescoping Bars: Two sliding tubes held in place by a pin.
- Sway Chains: Chains, many built with a turnbuckle, linking the lower lift arms to the tractor frame.
Step By Step
- Park Safely: Park the tractor on a level surface, lower the implement to the ground, and shut off the engine.
- Center the Implement: Manually push the implement so it is perfectly centered behind the tractor.
- Adjust the Stabilizers:
- For turnbuckles, turn the body of the turnbuckle on each side to shorten them. Adjust them evenly until you have removed most of the slack.
- For telescoping bars, remove the locking pins, slide the bars to the position that minimizes sway, and re-insert the pins.
- For sway chains, tighten the turnbuckle or adjust the chain length to remove excess slack.
- Check for Play: With the stabilizers tightened, try to push the implement side to side by hand. You should feel only about an inch of movement in either direction. This confirms the system has a tiny bit of flex without being loose.
But what happens when you’ve tightened everything, and the implement still sways? This is a common problem, and the fix is often not on the tractor itself.
What If the 3-Point Hitch Still Sways After Adjustment?
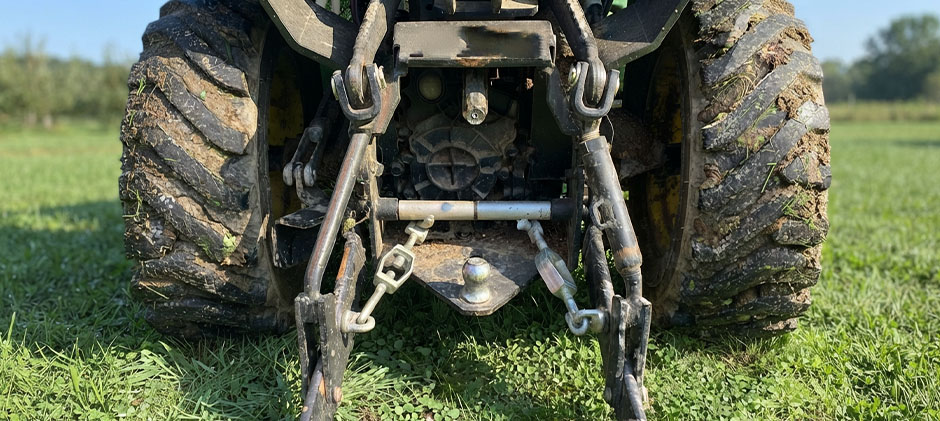
If you have tightened your stabilizers as far as they will go and the implement still moves excessively, the problem is almost certainly at the implement’s hitch pins. That space between the lift arm and the implement’s mounting bracket is the culprit.
The solution is to add bushings to take up this slack. Look at where your tractor’s lower lift arms connect to the implement pins. There’s usually a noticeable gap letting the arm slide side to side, and this open space needs to be filled. Pre-made kits with assorted bushings and spacers work perfectly to fix this issue. Here’s how to fix it:
- Disconnect one of the lower lift arms from the implement.
- Slide one or more bushings onto the hitch pin on the inside of the lift arm.
- Reconnect the lift arm. The bushings should now fill the gap, preventing the arm from sliding horizontally on the pin.
- Repeat on the other side.
- With the slack removed at the pins, you can now properly perform the 3-point hitch sway adjustment using your stabilizers as described in the previous section. They will now be effective because the entire system is rigid.
How to Stop a Bush Hog From Swaying Side to Side?
Let’s put it all together for the most common scenario: a swaying bush hog (rotary cutter). A bush hog must be kept under control to avoid hitting the tires and to ensure an even cut.
- Start at the Source: With the bush hog on the ground, check the hitch pins. If the lift arms can slide back and forth on the pins, add bushings to eliminate this horizontal play first. This is the most critical step.
- Center the Mower: Position the bush hog directly behind the tractor.
- Tighten the Stabilizers: Adjust your turnbuckles or stabilizer bars so there is only about 1-2 inches of total side-to-side movement. You want it snug, but not so tight that the system is under constant tension.
- Check Clearances: Lift the mower and ensure that even at full sway, it cannot come within a few inches of the rear tires. If it’s still too close, you may need to adjust your rear tire width to the “wide” position if your tractor allows for it.
FAQs
Why does my bush hog sway side to side even with the stabilizers fully tightened?
It almost always happens because the tractor lift arms slide left and right on the implement’s hitch pins. Even tight stabilizers can’t stop movement if there’s slack at this connection point. Just add bushings or spacers on the pins inside the lift arms to close that gap and stop the sliding.
How much side-to-side movement is normal for a 3-point hitch rotary cutter?
A little movement is fine. About 1 to 2 inches of total side-to-side swing works to soak up shocks. But the mower should never swing close, within 1 or 2 inches, to your rear tires while you work. We want to control sway, not lock it out completely.
Do I need to tighten the stabilizers when using a moldboard plow?
No, you do the exact opposite. A moldboard plow needs to move side to side freely so it can follow the furrow correctly. Tight stabilizers will make the plow pull the tractor from the back. That’s unsafe and hard to handle. Keep stabilizers loose or disconnect them when plowing.
Final Thoughts
Knowing how to adjust 3-point hitch sway can help keep your tractor and implements safe and working properly. The right amount of movement depends on the implement, so avoid making the hitch too tight. Check the hitch pins and bushings if you still have too much sway. When you need replacement parts, FridayParts offers aftermarket parts for a wide range of tractors and implements. Keep your equipment running reliably!
