
A worn serpentine belt can quietly turn into a job-stopper on off-road equipment: the alternator may not charge, coolant temps can climb fast if the water pump slows, and any belt-driven accessories can drop out without warning. In this guide, we’ll explain what the belt does on a 6.7 Cummins used in off-road machinery, when to replace it, and a step-by-step method to swap it correctly—plus what problems to check so the new belt doesn’t fail early.
What is a Serpentine Belt?
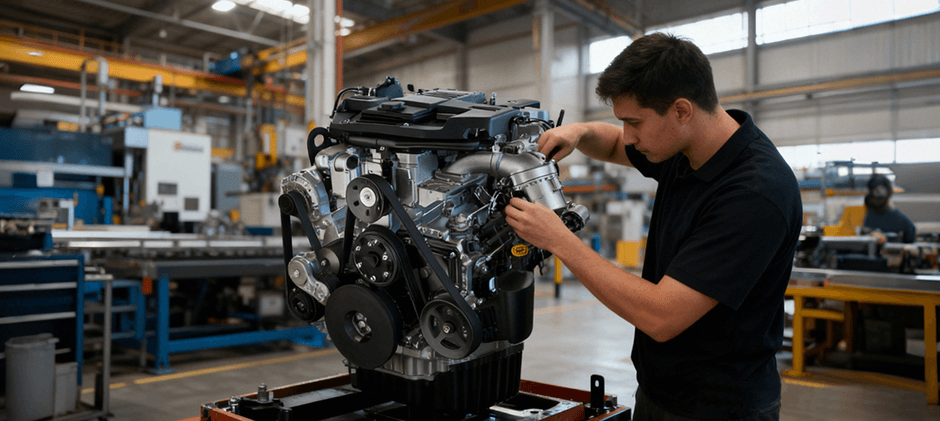
A serpentine belt (also called an accessory drive belt or drive belt) is a single multi-ribbed belt that wraps around several pulleys on the front of the engine. On a 6.7 Cummins installed in off-road machines (think equipment that lives in dust, vibration, and long idle hours), that belt is the link that transfers crankshaft rotation to key accessories.
Most 6.7 Cummins accessory setups commonly include pulleys and components such as:
- Crankshaft pulley (harmonic balancer)
- Alternator
- Water pump (belt-driven on many configurations)
- Fan drive or fan hub (machine-dependent)
- A/C compressor (if equipped)
- Belt tensioner
- Idler pulley(s)
Because the belt touches multiple systems, a small issue (weak tensioner, worn pulley bearing, misalignment) can show up as several “random” symptoms. That’s why you treat the belt as a system, not a single part.
When To Replace Your Serpentine Belt?
For off-road machinery, hours and conditions matter more than miles. Even if the belt “looks okay,” the rubber compound ages from heat cycling, oil mist, dust abrasion, and constant load changes (like fan engagement or hydraulic demand affecting idle speed).
Replace the serpentine belt if you notice:
- Squeal/chirp at start-up or under load (often belt slip)
- Visible cracks across ribs, missing chunks, glazing (shiny surface), frayed edges
- Rib wear that looks uneven (can point to misalignment)
- Belt contamination (oil/coolant soaking the ribs)
- Repeated alternator low-voltage events or accessory dropouts
Replace related parts if the belt failed early
If the belt is shredded, keeps walking off, or the ribs wear fast, we strongly recommend inspecting (and often replacing) the belt tensioner and any noisy idler pulley at the same time. A new belt on worn bearings or a weak tensioner is a common “comeback” on equipment that can’t afford downtime.
Quick inspection tip: with the engine OFF and cool, twist the belt at its longest span. If it twists too easily, tension may be low (though the exact feel varies by design). Also, spin idlers by hand—any grinding, wobble, or roughness is a red flag.

Replacing The Serpentine Belt
Before you start: belt routing varies by machine and accessory package, even with the same base engine. You always verify routing using the machine’s belt diagram decal or service manual. If the decal is missing, take clear photos before removal.
Tools & prep (keep it simple and safe)
- Correct replacement serpentine belt (match length and rib count)
- Serpentine belt tool or long-handled ratchet/breaker bar (tensioner release)
- Basic sockets/wrenches for guards and covers
- Flashlight, gloves, eye protection
- Optional: straightedge for alignment checks
Safety first (off-road jobsite reality):
- Park safely, set the brake, lower the attachments, and turn the key off.
- Let the engine cool fully—hot coolant and rotating fan systems are serious hazards.
- Disable unintended start (lockout/tagout practices).
- Keep hands clear of fan blades and pinch points.
Step-by-step: belt removal and installation
1) Gain access
On many off-road machines, the most time-consuming task is removing access panels, belly pans, or front guards. Remove only what you need, but don’t force your hands into tight spaces—rushed work leads to missed routing and damaged ribs.
2) Locate the tensioner and identify the rotation direction
Find the belt tensioner pulley. Most tensioners have a hex fitting or square drive for a tool. Note whether the tensioner is clockwise or counterclockwise to release tension (varies). If you’re unsure, check the manual—don’t guess.
3) Relieve tension
Rotate the tensioner smoothly to relieve belt tension. Hold it in the released position.
Then slip the belt off an easy-to-reach smooth pulley (often an idler) or an accessory pulley that gives you room. Avoid prying the belt off with screwdrivers—this can nick pulley grooves and shorten belt life.
4) Remove the old belt
Once free from one pulley, walk the belt off the rest. As you remove it, do a fast “failure read”:
- One edge polished? Possible misalignment.
- Ribs missing in one section? Possible seized pulley or debris ingestion.
- Glazed ribs? Possible tensioner weakness or slipping accessory.
5) Inspect pulleys and accessory bearings
This step is what prevents repeat failures:
- Spin each idler and tensioner pulley by hand: listen/feel for roughness.
- Check for wobble: a pulley that tilts or moves side-to-side can shred ribs.
- Look for pulley grooves packed with mud or rubber.
- Check accessory pulleys (alternator, water pump, A/C if equipped) for bearing noise or drag.
If any pulley is questionable, fixing it now is cheaper than throwing another belt later.
6) Route the new belt
Route the new serpentine belt around the pulleys following the correct diagram. General routing practice:
- Seat ribs fully into the grooved pulleys (no riding on the edges).
- Keep the belt centered.
- Leave the tensioner pulley for last (often easiest).
7) Apply tension and secure the belt
Rotate the tensioner again, slip the belt onto the final pulley, then gently release the tensioner back into position. Don’t let it snap back—a hard rebound can damage the tensioner.
8) Final checks before start
- Confirm every rib is seated in every grooved pulley.
- Confirm the belt is not hanging off any pulley edge.
- Verify guards and covers are reinstalled, and clear the belt path.
9) Start and verify
Start the engine and observe:
- Belt tracks centered (no walking).
- No chirp/squeal after a brief warm-up.
- Charging voltage is stable (if you monitor it).
- Shut down and recheck the belt seating if anything looks off.
Optional “while you’re here” service checklist
If your machine is already open, this is a good time to reduce repeat downtime:
| Item | Why it matters | What do you look for |
|---|---|---|
| Belt tensioner | Maintains proper belt grip | Weak spring, bounce, noisy bearing |
| Idler pulley | Guides belt; common bearing failure | Rough spin, wobble, heat discoloration |
| Pulley alignment | Misalignment kills belts fast | Belt edge wear, belt walk |
| Contamination source | Oil/coolant ruins rubber | Leaks above the belt path |
Mid-Job Parts Planning (Keep Downtime Low)
If you’re changing a serpentine belt on a 6.7 Cummins in an off-road machine, you usually plan for the parts that most often cause repeat failures: belt tensioners, idler pulleys, and any worn accessory pulleys. That’s also when many owners prefer to source other engine-related wear items in the same order to avoid multiple shipping cycles and repeat teardown time.
When you’re ready to shop engine and accessory-drive replacements for equipment applications, you can browse Cummins parts and filter by your model path. We keep a broad aftermarket inventory aimed at heavy equipment and off-road machinery needs—so you can match the right part without overpaying for downtime.
Problems With The Serpentine Belt
When a serpentine belt problem hits off-road equipment, the symptoms often show up as “system issues” (cooling, charging, HVAC) rather than a clear belt complaint. Here are the most common failure modes we see and how you sort them out.
1) Squealing or chirping
Usually belt slips. Common root causes:
- Weak belt tensioner
- Belt stretched or glazed
- Contaminated belt/pulley (oil, coolant, hydraulic mist)
- High accessory load (bearing drag)
What we do: inspect tensioner travel and bearing, clean/replace contaminated parts, and confirm correct belt spec.
2) Belt walking off / edge fraying
Often alignment or pulley damage:
- Bent bracket
- Misaligned accessory
- Damaged pulley grooves
- Incorrect belt width/rib count
What you do: check alignment with a straightedge across pulley faces; verify belt routing and correct part.
3) Repeated belt failure (short life)
This is a “system” issue, not a belt brand issue, in most cases:
- Seized idler/tensioner pulley bearing
- The alternator or water pump bearing is starting to lock up
- Debris ingestion (rocks/mud) due to missing guards
- Wrong installation (ribs not seated, belt twisted)
4) Overheating or low charging tied to the belt drive
A slipping belt can reduce accessory speed:
- Water pump speed drop → coolant temp climbs
- Alternator speed drop → battery/voltage issues
- Fan drive effectiveness changes (depending on design)
Conclusion
Changing a serpentine belt on a 6.7 Cummins in off-road machinery is straightforward when we treat it as an accessory-drive system job: verify routing, release the tensioner safely, inspect idlers and pulley alignment, and confirm every rib is seated before startup. Most repeat failures come from skipped inspections—weak tensioners, rough idler bearings, or contamination. For affordable, high-quality aftermarket replacements with wide compatibility, FridayParts helps keep your equipment running and your downtime predictable.